
- Email, from your mailboxes
- Phone, through the Dialer
Primary mailbox
Your primary mailbox is your main email address, and the one Ava monitors for replies and booked meetings.Connecting the primary mailbox
- In the dashboard, click your profile.
- Select Settings.
- Scroll down to Outreach channels.
- Select Primary mailbox.
- Click Connect mailbox.
- Choose your email service provider (Google or Microsoft).
- Grant all requested permissions when prompted.
Adding the meeting booking link
The meeting booking link will be included in outreach emails/messages so prospects can book meetings with you.- In the dashboard, click your profile.
- Select Settings.
- Scroll down to Outreach channels.
- Select Add link next to Meeting booking link.
- Paste your booking link (Calendly, Google Calendar, Cal.com, etc).
- Select Save.
Adding the email signature.
You can add an email signature to your emails with your name, job title, company, website, phone, and address.- In the dashboard, click your profile.
- Select Settings.
- Scroll down to Outreach channels.
- Click the edit icon next to Signature.
- Fill out the data. You can also add an HTML signature.
- Once you fill out the details, select Save.
Setting the daily send limit.
You can set the daily send limit to control how many emails are sent per day. From your primary email, the maximum number of emails you can send per day is 100. But we recommend keeping it at 50 or lower to maintain the health of your primary email.- In the dashboard, click your profile.
- Select Settings.
- Scroll down to Outreach channels.
- Click the pencil icon next to Daily send limit.
- Set the limit as you need.
- Select Save.
Disconnecting your mailbox
- In the dashboard, click your profile.
- Select Settings.
- Scroll down to Outreach channels.
- Select Disconnect next to Disconnect mailbox.
- Confirm the action.
Turning off primary mailbox sending
You can turn off your primary mailbox for a campaign in the campaign’s Settings; go to Advanced → Mailboxes and turn off Use primary mailboxes.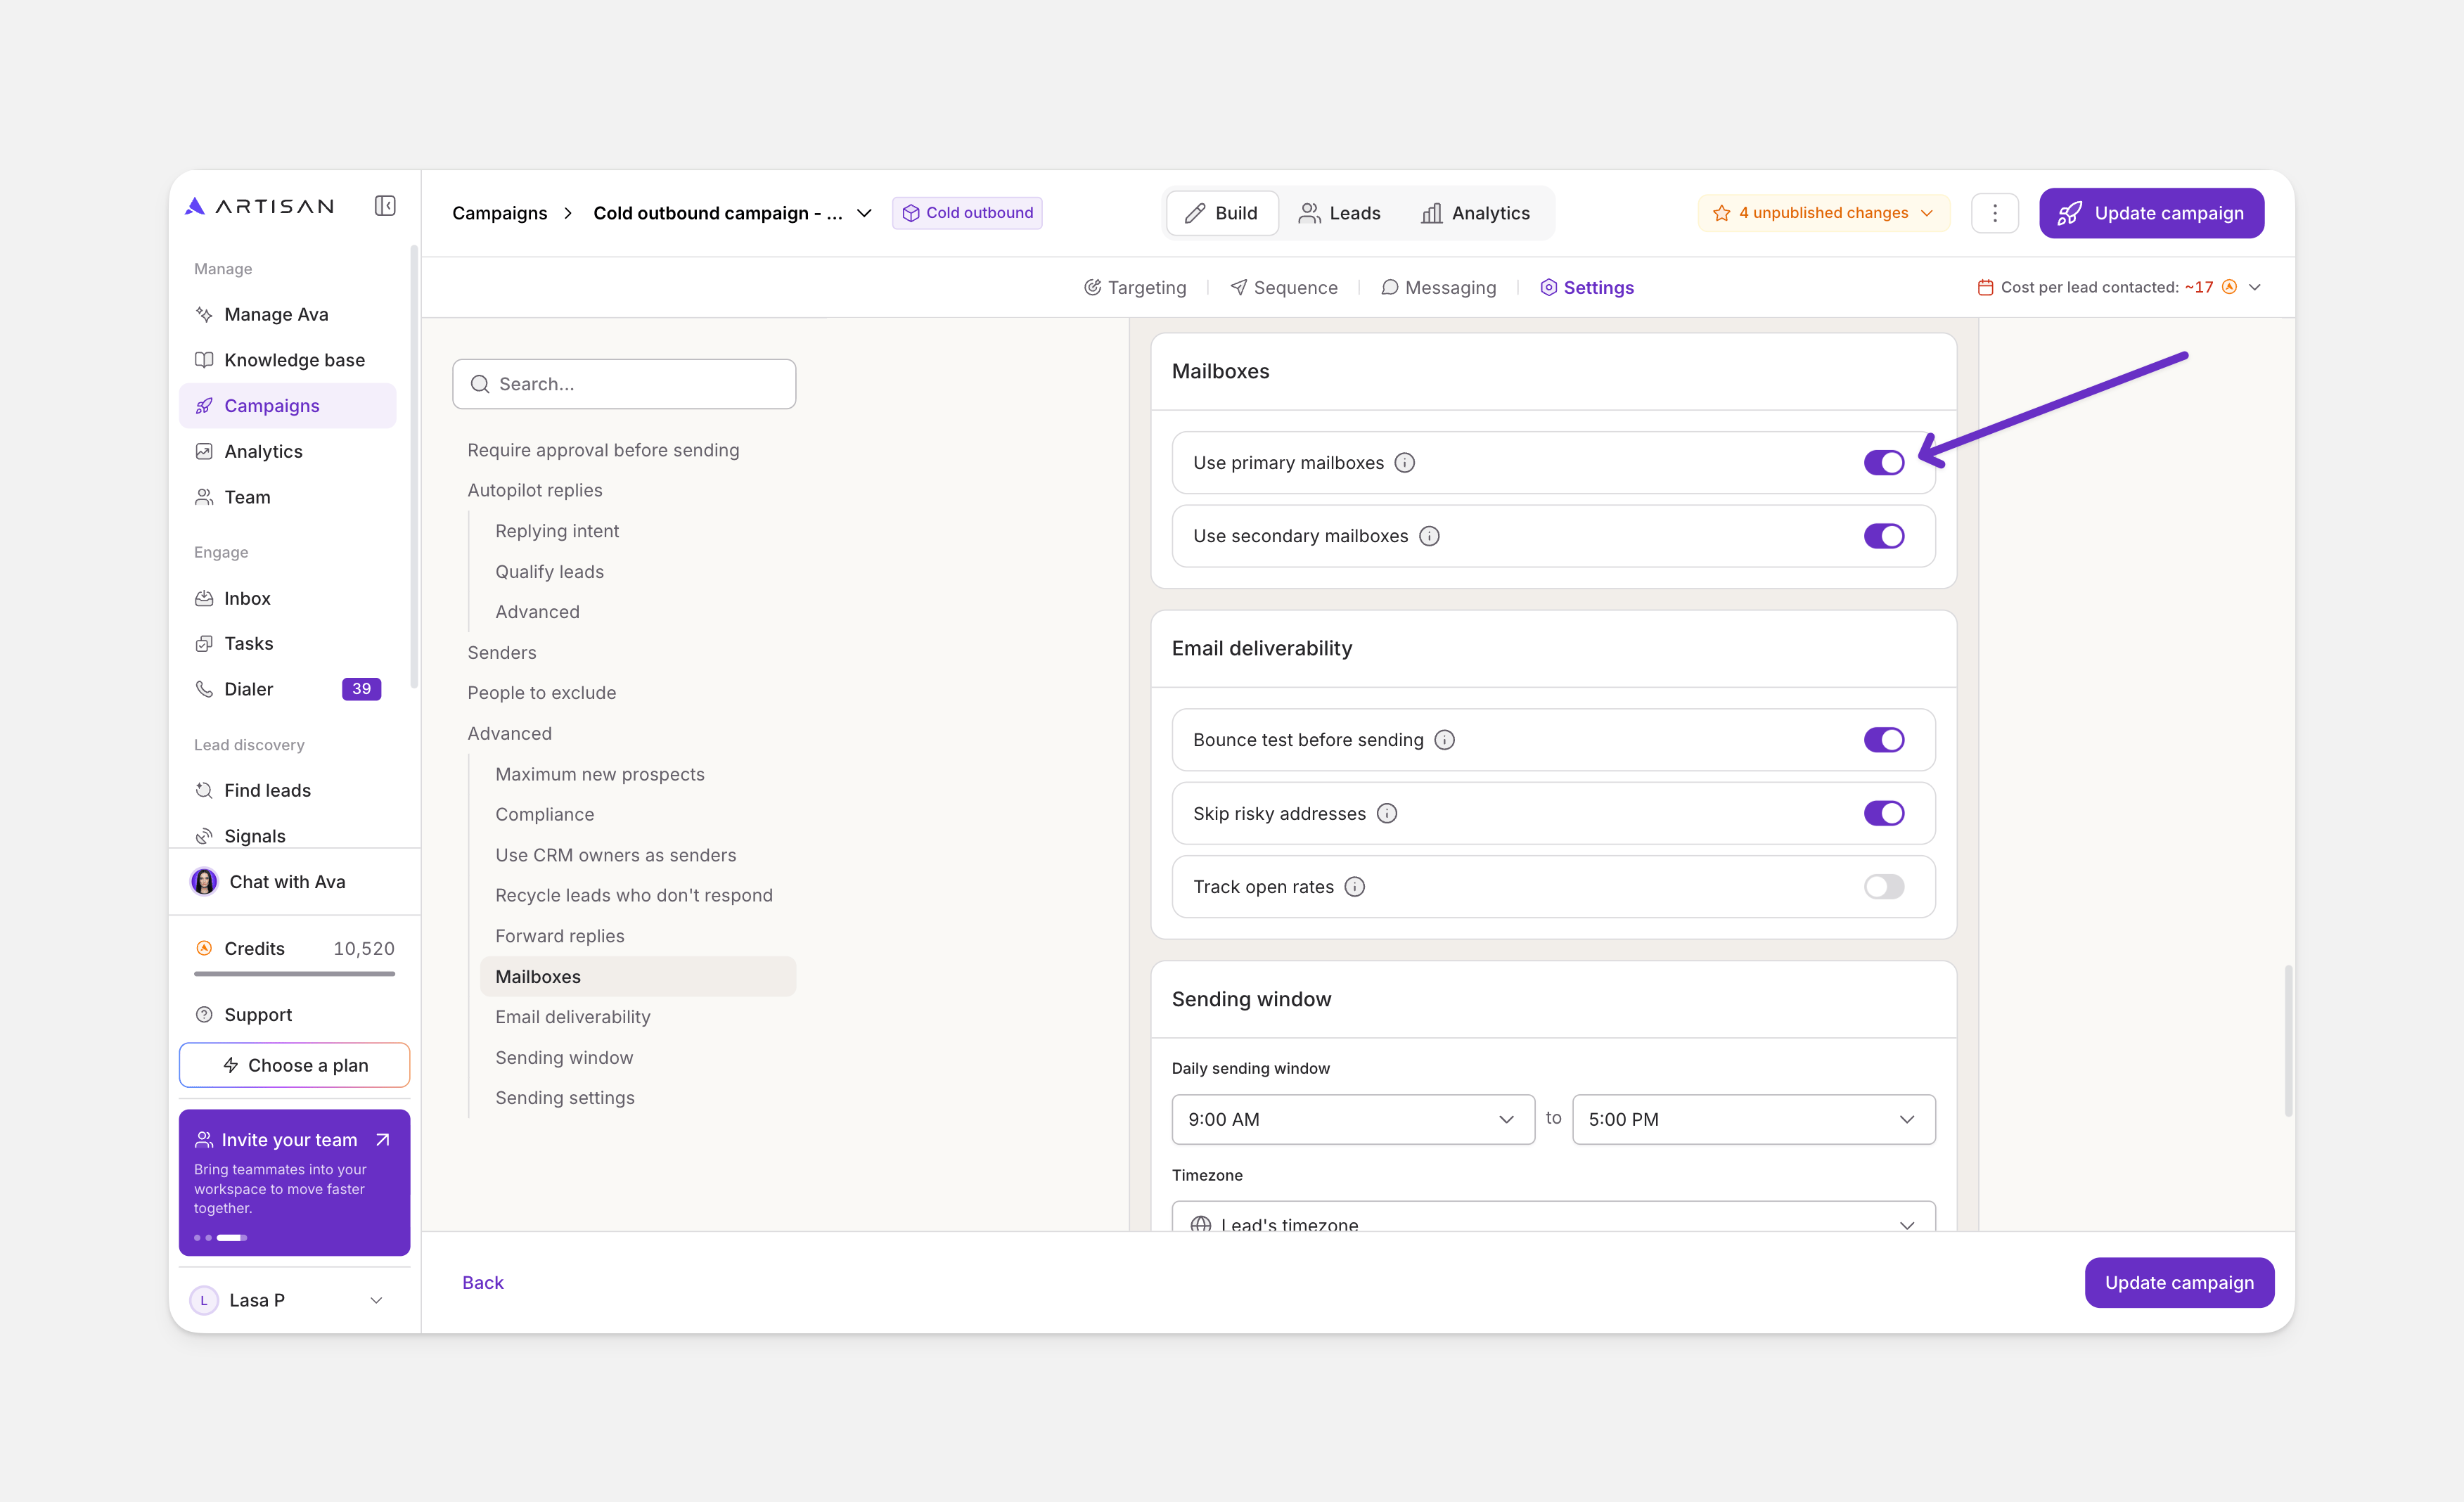
Dialer
The Dialer is Ava’s calling channel. To make calls, you need a Dialer seat and at least one phone number. On the Dialer tab, you assign a seat, see your daily calling capacity, and can purchase phone numbers.Assigning a seat
- In the dashboard, click your profile.
- Select Settings.
- Scroll down to Outreach channels.
- Open the Dialer tab.
- Select Assign seat.
- Enter your callback number. This is your own real phone number, so leads can reach you back after a call or a missed call.
- Select Assign seat to confirm.
Removing a seat
To give up your seat, select Remove seat. Once removed, you won’t be able to make calls using the Dialer.Frequently asked questions
I connected my mailbox during onboarding. Do I need to do this again?
I connected my mailbox during onboarding. Do I need to do this again?
No. If you connected during onboarding, your primary mailbox is already set. You can still come here to add your booking link, signature, or daily send limit.
What's a Dialer seat?
What's a Dialer seat?
A seat is a paid license that lets one person make calls through the Dialer. You buy seats and assign one to each team member who needs to call. When you assign a seat, you add that person’s callback number so they can take callbacks from leads. Phone numbers are separate: they’re shared across everyone with a seat, and Ava rotates between them automatically.